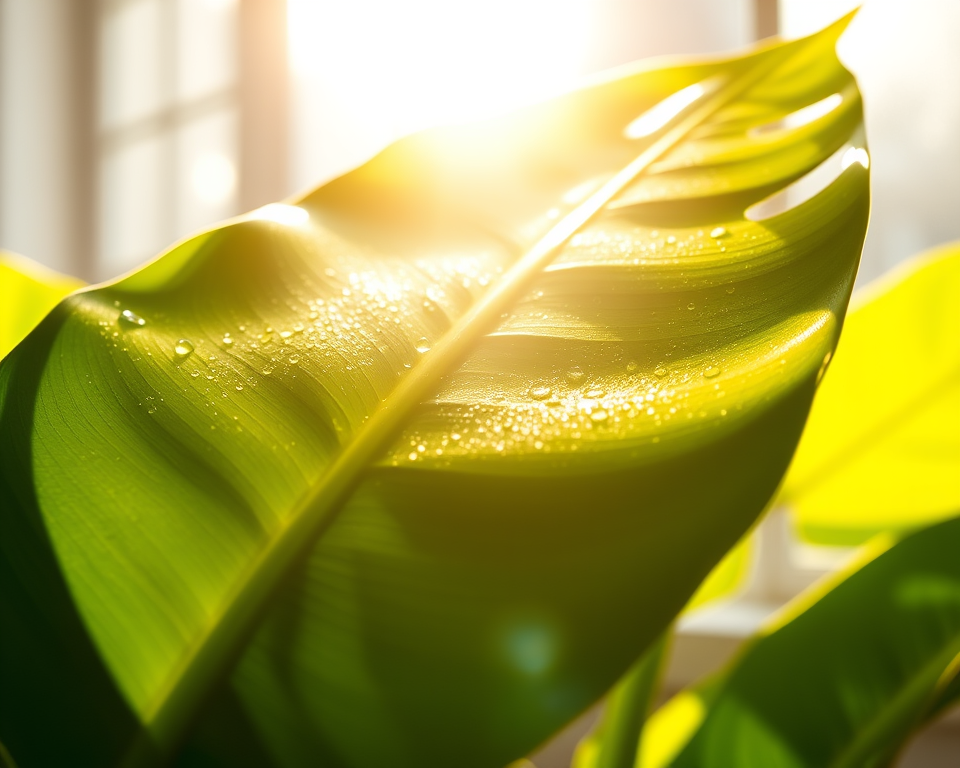
I gotta tell you: when it comes to houseplants, there’s this magical feeling you get when everything looks clean and vibrant. Seeing your plants shine with healthy leaves actually boosts your mood! Let’s face it, though—keeping those beauties spotless isn’t always a walk in the park. Between the dust accumulation and the odd bug hiding out in the foliage, you might feel overwhelmed. But trust me, I’m here to break it down and make it easy for you. Let’s jump right in!
Table of Contents
- 1 Key Takeaways
- 2 Step 1: Gather Your Cleaning Supplies
- 3 Step 2: Determine Your Cleaning Frequency
- 4 Step 3: Inspect Your Houseplants
- 5 Step 4: Start the Cleaning Process
- 6 Step 5: Special Care for Different Plant Types
- 7 Step 6: Post-Cleaning Maintenance
- 8 Step 7: Address Common Plant Cleaning Mistakes
- 9 Frequently Asked Questions
- 9.1 How can I tell if my plant needs to be cleaned?
- 9.2 Are there specific cleaning techniques for delicate leaves?
- 9.3 How do I identify common pests on houseplants?
- 9.4 What should I avoid when cleaning my houseplants?
- 9.5 Is there a best time of year to clean my houseplants?
- 9.6 How do humidity levels affect my houseplant’s cleaning needs?
- 9.7 Can I use commercial cleaning products on my plants?
- 9.8 What are the best practices for cleaning specific plant varieties?
- 9.9 After cleaning, how can I ensure my plants stay healthy?
- 9.10 What are common mistakes to avoid when caring for houseplants?
Key Takeaways
- Clean your houseplants regularly to promote health and aesthetics. It’s worth the time!
- Use eco-friendly cleaning solutions—your plants and the environment will thank you.
- Inspect your plants often to catch issues early and keep them thriving.
- Tailor your cleaning methods to specific plant types for the best results.
- Avoid common mistakes that could harm your plants, like using the wrong products.
Step 1: Gather Your Cleaning Supplies
Before you can make your houseplants shine, you need to round up your cleaning supplies. I can’t stress enough how important it is to have the right tools on hand to avoid stressing your plants.
Selecting the Right Tools and Materials
Alright, so what do you need? Here’s a handy list of items I always keep in my plant care arsenal:
- Microfiber Cloths: These are a must! They’re gentle on leaves and won’t scratch them.
- Soft Brushes: Think paintbrushes or small fan brushes for those nooks and crannies where dust loves to hide.
- Natural Solutions: You can create your own mix using a few drops of mild dish soap in water. It’s hard to beat the affordability and safety of this combo.
- Water Sprayer: A fine mist takes care of dust without drenching the plant. This is also great for humidity-loving plants!
When you’re looking for cleaning supplies, just focus on those that are gentle and safe for plants. You don’t want to throw any harsh chemicals into the mix.
Eco-Friendly Cleaning Solutions
If you’re like me, you probably care about the planet too. Thankfully, you can keep your plants clean while being eco-conscious. Consider whipping up a natural cleaning solution using simple ingredients. For instance, mixing equal parts of water and white vinegar makes a great leaf cleaner that cuts through grime.
Here’s a quick recipe:
– 1 cup of water
– 1 cup of white vinegar
Just mix and spray! Just remember to do a patch test on a small leaf first, as some plants can be sensitive.
Step 2: Determine Your Cleaning Frequency
Now that you’ve got your supplies lined up, let’s talk timing. How often should you be cleaning these leafy wonders?
Factors Affecting Cleaning Frequency
There’s no one-size-fits-all here. Factors like your environment, the type of plants, and even the seasons play a huge role. If you live in a dusty area or have pets, you’ll notice that dust builds up faster. For most plants, I recommend a thorough cleaning every couple of weeks. If you can do quick wipes weekly, that’s even better.
What’s Your Plant’s Personality?
You’ll want to adjust based on these parameters for each of your plants:
– Light Exposure: Plants in brighter spots may collect dust quicker.
– Humidity Levels: A more humid environment can lead to mold, so keep a closer eye on leaves.
– Plant Types: Some plants, like snake plants, have tougher leaves that may require less frequent cleaning. Conversely, softer leaves like those on ferns need extra care.
Keeping a simple cleaning schedule helps! Here’s what I typically follow:
| Plant Type | Cleaning Frequency | Notes |
|---|---|---|
| Snake Plant | Every two weeks | Tough leaves; minimal care needed. |
| Pothos | Weekly | Dust and water often; loves humid air. |
| Ferns | Weekly or bi-weekly | Delicate leaves; gently wipe down. |
Step 3: Inspect Your Houseplants
Okay, now we’re moving on to the fun part—hands-on plant care! But before cleaning, give those plants a good inspection.
Common Issues to Look For
When you check your plants, keep an eye out for things like:
– Pests: Look for little critters like spider mites or aphids. Catching these early can save you a headache later.
– Leaf Health: Are there any spots or blemishes? These can indicate issues like overwatering or even disease.
– Discoloration: Yellowing leaves can suggest nutrient deficiencies or poor drainage.
If you notice anything off, address it before moving on with cleaning. The plants will appreciate it!
Step 4: Start the Cleaning Process
Time to get down to the nitty-gritty! This is where all your prep pays off.
Step-by-Step Cleaning Techniques
- Dust Removal: Start by gently wiping the leaves with a microfiber cloth. Work from top to bottom, allowing any dust to fall off.
- Bacteria and Mold Removal: For plants prone to mold, take your natural cleaning solution and give the leaves a light spray. This helps eliminate nasties without the heavy chemical load.
- Rinse Off (if needed): For a little TLC, you can also give hardy plants a gentle shower. Just be sure to avoid soggy soil.
“Giving your plants some love in the form of cleaning isn’t just about aesthetics; it promotes healthier growth and a vibrant home!”
Step 5: Special Care for Different Plant Types
Not all plants are created equal, right? Each has its own quirks and needs when it comes to cleaning.
Recommendations for Popular Houseplants
Let’s dive into some specifics. I’m taking you through a few of what I consider the rock stars of houseplants:
- Succulents: These beauties prefer a quick wipe down with a cloth; too much moisture can do more harm than good.
- Tropical Plants: Species like peace lilies and ferns benefit from regular misting, plus a gentle wipe to keep their leaves clean.
- Cacti: Less maintenance overall, but a light brush to remove dust is critical. You don’t want those prickly friends to trap debris.
By tailoring your approach based on species, you can keep your houseplants healthier and more vibrant.
Step 6: Post-Cleaning Maintenance
You’ve done an awesome job cleaning, but don’t stop there! After-care is crucial to keep that momentum going.
Signs Your Plants Are Thriving
After your cleaning session, stay alert! Here are signs you’re on the right track:
– Healthy Growth: Check for new leaves sprouting—that’s a fantastic indicator.
– Vibrant Color: A plant that’s thriving should show deep greens or vibrant colors, depending on the species.
– Pest-Free Observation: Always keep an eye for critters in the days following. If all checks out, you’re golden!
A proper hydration check will make a big difference in how your plants react post-cleaning, too. Adjust watering routines as needed and consider giving them a light fertilization when they show signs of vigorous growth.
Step 7: Address Common Plant Cleaning Mistakes
Let’s set the record straight. There are some classic mistakes folks make when cleaning houseplants that can lead to real issues.
Tips for Successful Plant Cleaning
To save you from my follies, here are a few points you’ll want to remember:
- Avoid Over-Watering: Cleaning can make it tempting to water too much. Remember—wet leaves can lead to mold.
- Don’t Use Harsh Chemicals: I can’t stress this enough! Stick to natural solutions.
- Use the Right Tools: For delicate plants, never grab that rough sponge. Stick with gentle materials.
“Cleaning plants isn’t just about a sparkly appearance; it’s about nurturing their health and preventing issues before they arise.”
If you keep this checklist in mind, you’ll steer clear of common pitfalls and keep your plants thriving.
Here’s a quick look at what we’ve covered to keep everything in one place:
| Step | Key Action |
|---|---|
| Gather Supplies | Use friendly tools and natural cleaners |
| Determine Frequency | Clean every couple of weeks or as needed |
| Inspect Plants | Look for pests and health issues |
| Start Cleaning Process | Dust, rinse if necessary, use natural solutions |
| Care by Plant Type | Tailor methods based on species |
| Post-Cleaning Check | Hydrate, fertilize, and observe |
| Avoid Mistakes | Stick with gentleness and natural methods |
And with that, you’re equipped and ready to give your houseplants the proper care they deserve. Enjoy the vibrant greens and the clean, fresh air they provide!
Frequently Asked Questions
How can I tell if my plant needs to be cleaned?
Plants often exhibit understated signs like dusty leaves or reduced color vibrancy. If you’ve noticed a buildup of dust or if leaves appear dull, it’s a good indicator that your plant could benefit from a cleaning session to improve its overall health and photosynthesis efficiency.
Are there specific cleaning techniques for delicate leaves?
Yes! For delicate leaves, such as those of ferns or orchids, use a damp microfiber cloth or soft sponge to wipe gently. Avoid using pressure to prevent damage, and consider lightly misting the leaves with water after cleaning to provide added moisture.
How do I identify common pests on houseplants?
Look for signs like sticky residue (honeydew), webbing, or tiny holes in leaves. Common pests include aphids, spider mites, and mealybugs. Regularly inspecting the undersides of leaves can help you catch infestations early for proper management.
What should I avoid when cleaning my houseplants?
Avoid using harsh chemicals, paper towels, or abrasive sponges, which can harm the plant or leave behind particles. Additionally, never use hot water, as it can shock the plant. Stick to gentle, natural solutions to safeguard your plants.
Is there a best time of year to clean my houseplants?
Cleaning can be performed year-round, but consider a thorough cleaning during spring and fall, following seasonal growth patterns. Spring cleaning helps promote growth, while seasonal maintenance can prevent dust buildup during winter months when houseplants often stay indoors.
How do humidity levels affect my houseplant’s cleaning needs?
Higher humidity levels typically increase the likelihood of mold and mildew, which can require more frequent cleaning. Conversely, low humidity can lead to dust accumulation. Monitoring these levels can help you develop a tailored cleaning frequency for optimal plant health.
Can I use commercial cleaning products on my plants?
It’s best to avoid commercial cleaning products that contain chemicals, as they might harm your houseplants. Instead, opt for eco-friendly solutions such as diluted vinegar or mild soap mixed with water to clean leaves without risking plant health.
What are the best practices for cleaning specific plant varieties?
Different plants may require specific techniques; for instance, spritzing succulents lightly with water while cleaning is effective, whereas rubber plants benefit from a more consistent wipe-down to maintain their glossy leaves. Researching your specific plant type will ensure effective care.
After cleaning, how can I ensure my plants stay healthy?
Post-cleaning care includes checking soil moisture levels, ensuring adequate light exposure, and avoiding over-fertilization immediately after cleaning. Regularly monitor plant health and positioning to maintain optimal conditions for growth and recovery.
What are common mistakes to avoid when caring for houseplants?
Common mistakes include over-watering after cleaning, using wrong cleaning materials, or neglecting to adjust cleaning frequency based on seasonal changes. Regular inspection and tailored care can help prevent these pitfalls and promote a healthy plant environment.